
A surplus of cardboard boxes means only one thing: craft time! We’ve been enjoying lots of Greek myths lately, especially any to do with Crete now that our first ever family holiday is edging closer. So, tasked with choosing an activity for our cardboard mountain, the 6yo decided on mythological masks – and chose a super starting point: Theseus and the Minotaur!
The story of Theseus and the Minotaur is often one of the early encounters kids have with Greek mythology, and you’ll find it lurking in nearly all of the children’s collections of Greek myths. We read the version in the classic Usborne Greek Myths for Young Children before getting started. It is a fairly short and simple retelling, which focuses on the main narrative points: terrible monster lives in an impossible labyrinth and likes eating people, brave hero defeats the monster and escapes..

To make your own Theseus and the Minotaur masks, you’ll need:
- 2 Large Bits of Card/Cardboard – roughly A3-ish in size, but as long as it is bigger than your face it should be fine! We used old packaging from parcels.
- 3 Medium Bits of Card/Cardboard – roughly A4 for these ones. Cereal boxes or Amazon packing can be really useful! We unfolded a long strip of cardboard packing for these
- Pencil
- Paints (any kind)
- Markers
- Scissors
- Glue
- Selection of coloured paper / card – but this isn’t essential, painting the details on would work just as well
Let’s start with our Minotaur mask!

© Marie-Lan Nguyen / Wikimedia Commons / CC-BY 2.5
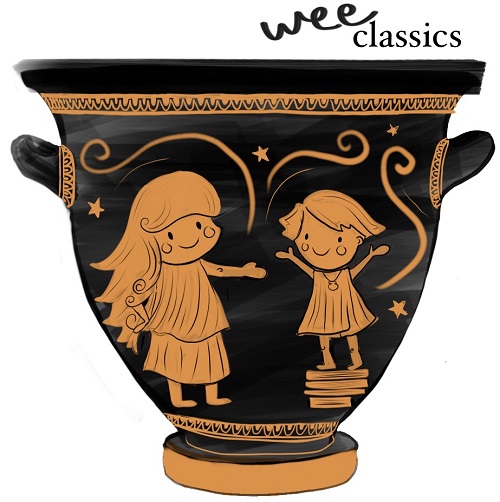
Look at some different pictures of the Minotaur for inspiration – the ancient Greeks liked to put him on their art, too, as you can see in the example from a Greek pot above. We decided to simplify the shapes a bit for our masks – but feel free to experiment with your own monster shape!
Step 1: Minotaur Shapes
Draw and cut out a rounded rectangle on one of the A3 pieces of card. This will be the Minotaur’s head. Next, draw and cut out a rounded rectangle on one of the A4 pieces of card. This will be the Minotaur’s nose!

Step 2: Minotaur Colour
Now you have your basic Minotaur shapes, it is time to get messy! The Minotaur has the head of a bull, so darker colours like brown or grey are often used for his head, but you can choose whatever colour you like! The 6yo went for a traditional brown with less traditional neon yellow highlights. Paint both of your cardboard rectangles – the head and the nose – and leave aside to dry.

Step 3: Minotaur Horns
While the paint dries, we can get some of our other bits and pieces ready – and what is a ferocious Minotaur without his horns? We decided to use the amazing stone Bulls Head from Knossos as inspiration here – just look at those shiny golden horns!

© Zde / Wikimedia Commons / CC-BY 2.5
Take your two A4-ish pieces of cardboard, and draw a twisty horn shape on each one like below. One horn per card! Make sure you draw them pointing in opposite directions: one horn twisting left and one horn twisting right.

Instead of painting the horns, we cut the same shapes out of coloured card and stuck them on top. You could even decorate them collage style if you have lots of smaller scraps of coloured paper or card to use up!
Step 4: Minotaur Eyes
We decided we’d give our Minotaur its own eyes on the mask, then cut our own smaller eye-holes for the mask-wearer to see out of a bit further down. We then experimented with lots of different shapes to see what would work for a scary Minotaur. We decided cutting out the shapes from paper was the best way to make them identical – but you can just as easily paint the eyes on, or cut all the shapes from white paper and then colour them in. You’re the boss!

For our scary eyes —
WHITE PAPER: fold a sheet of white paper in half. Cut out an oval shape – like a lemon! – this will become the white of the eyes. On the same sheet, still folded over, cut out a small sausage shape. This will be a highlight on the pupil.
COLOURED PAPER: fold a sheet of any coloured paper in half. Cut out a smaller oval shape than before – these will be the iris of each eye.
BLACK PAPER: fold a sheet of black paper in half. Cut out a small circle. These will be the pupil of each eye.
Glue the eye pieces together. We started from the smallest piece to the biggest – the highlight onto the pupil, the pupil onto the iris, then everything onto the white oval.
Step 5: Minotaur Expression
After all that fun with eyes, your painted Minotaur head and nose should be dry. Turn the larger rectangle lengthways, and glue the eyes on about a third of the way down. Take some scraps from the card/cardboard you’ve been using so far and cut thin strips to make eyebrows. We had a lot of fun making silly faces at each-other to work out the best shapes for angry eyebrows!

Step 6: Minotaur Nose
Next, take the smaller nose rectangle and draw two big nostrils. We used markers for this! We then cut a circle out of our coloured yellow card, and folded it over carefully to cut out a smaller circle from the inside. We were left with this lovely ring – but needed a bit of magic to make it go through the nose!

Lay the nose ring over the nostrils and mark on it where the inside nostril line is on each side. Then, cut across both lines on the ring, leaving a C-shape. Glue the ring back in place, and voilà! You have now pierced a Minotaur’s nose.
Step 7: Minotaur Assembly
Place the nose onto the Minotaur head – have a play around with placement before gluing it. The nose should sit just under halfway down the head, leaving a bit of room underneath. We thought our Minotaur didn’t look scary enough yet so we added some pointy teeth cut out from a scrap of white paper and glued them to the back of the nose. You could even add a tongue!
Once we were happy with how things looked, we finally stuck the nose to the head with a lot of glue. We put the mask underneath a stack of heavy books to help stick them together.
Step 8: Horns!
The final step was to attach the Minotaur’s horns. Carefully turn your mask over onto a clean surface. On the back of the mask, arrange the two horns so they are each point outwards. Aim for them to be roughly symmetrical when viewing the mask from the front – but make sure there is enough of the bottom part of the horn overlapping with the mask, so it supports the horn’s weight. You don’t want them to flop over!

This bit can be fiddly – especially, if like us, you didn’t cut them the same way at the start (whoops). But once you’re happy with how they look, stick the horns down with plenty of glue again. We put our Minotaur mask under some heavy books again too, just to be sure everything was firmly stuck together.
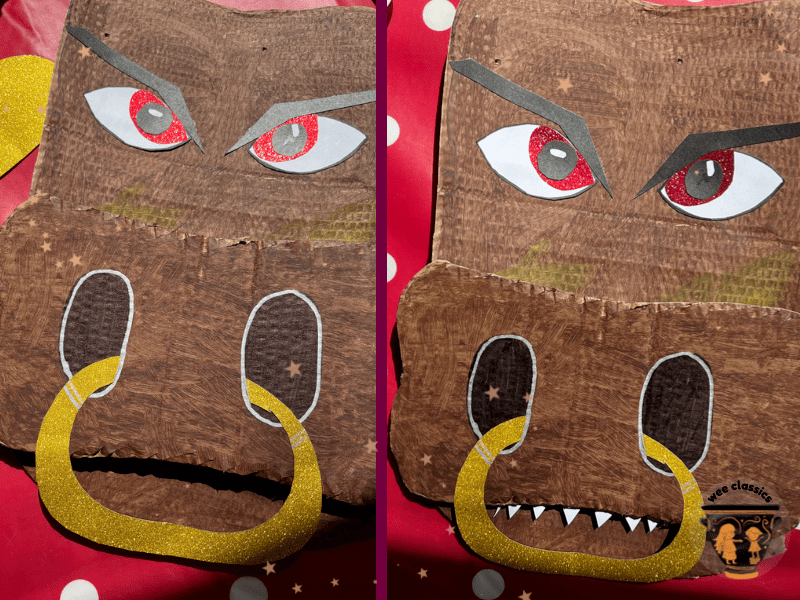
When you’re feeling brave, lift off the books and turn him over!

Hurrah! You now have your very own terrifying Minotaur!
When you’re sure all the paint and glue is dry, measure the mask against your face to work out where best to place the eye-holes. We snuck ours into the nostrils where they wouldn’t be noticeable. You can then attach some elastic (wide enough to fit your head!) to each side of the mask.
But now.. we need a hero to defeat this terrible monster!
The Theseus mask is a little simpler to make – I let the 6yo do most of this one himself, and it turned out adorable.
Step 1: Theseus’ Head
Take your other large piece of cardboard. Using a marker, draw the outline of a head – as big as you can! Add outlines for the eyes, nose, and mouth.

Step 2: Painting Theseus
Paint your chosen skin colour over the whole head. We didn’t cut the shape out first this time, because of the more awkward shape. Once the paint is dry, cut the head out as before.

Step 3: Theseus’ Eyes
Like the Minotaur, we wanted to give Theseus big bright eyes. But this time we thought they should be a bit less scary, so we chose a circle shape and a different colour for the iris.

Like before, we folded over the paper and cut the shapes out, but you could just as easily paint the eyes on Theseus directly or colour in the white paper!
For Theseus’ shocked heroic eyes:
WHITE PAPER: two large circles and two teeny weeny circles
GREEN PAPER: two green circles, smaller than the large white circles
BLACK PAPER: two black circles, smaller than the green circles
Glue the parts of the eye together – the small white circle onto the black pupil, the pupil onto the green iris, and then everything onto the large white circle.
Step 4: Theseus’ Face
Since his nose and mouth were also simple shapes, we thought cutting them out from coloured paper was the best way to make them stand out! Cut a triangle for the nose, and a circle if you want a shocked / shouty mouth. We cut half a circle from red paper as a tongue. Stick the shapes onto the mask, over the lines you had drawn with the marker.
You can add more details wherever you think they’re needed! We gave Theseus some rosy cheeks. It’s tough work running through the labyrinth.
Step 5: Theseus’ Hair
The last thing Theseus needs is some hair! You can keep this step simple by painting it on once the base colour is dry.
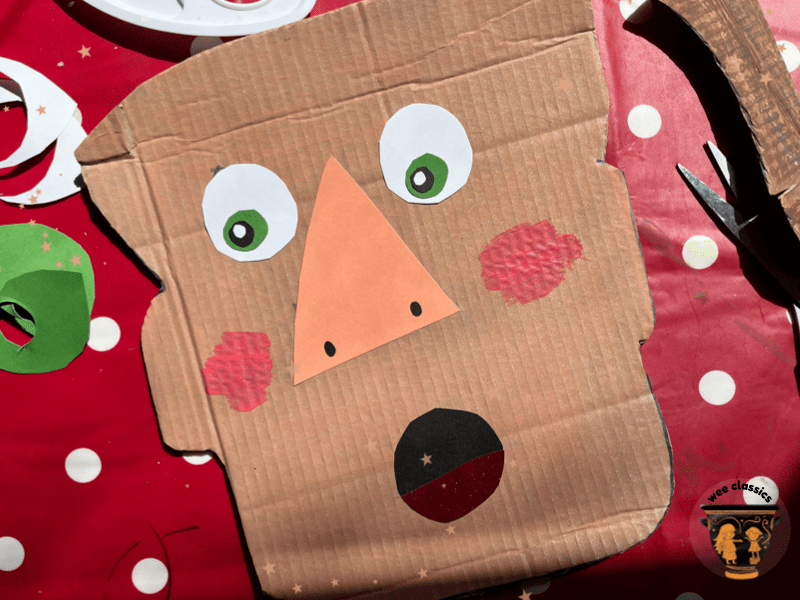
We used some of our leftover scrappy bits of cardboard for this (you’ll notice his hair is suspiciously similar in colour to the Minotaur…!) Cut the card into a messy spiky hair shape and stick to top of Theseus’ head. If you’re lucky enough to have some spare wool lying around you can give him an even fancier hairstyle! We popped him under the heavy books to make sure everything was stuck together – and now we have our hero!

Happy be, Theseus!
These masks are nice and simple to make, but still work really well for retelling the stories. Create your own script for the fight between Theseus and the Minotaur – maybe in your story, the Minotaur won’t be defeated? Maybe Theseus is really the bad guy? Or maybe the Minotaur has Theseus and chips for his dinner after all…

