Okay, okay, I realise the Stone Age sits slightly outside the parameters of our usual historical period. But we recently tried out one of the projects in Hands-on History: Stone Age by Charlotte Hurdman as part of the 7yo’s project-based learning homework. And despite having to substitute a few items, we were very pleased with the results! So if you’d like to learn how to create your own Stone Age hut from clay, twigs, and bits of stuff from around the house – read on!

As part of the KS2 curriculum here in England kids investigate the Stone Age, so the 7yo has been regaling us with fun facts about a period I frankly know nothing about! He’s loved telling us all about the different activities, animals, and people during the Stone Age. So as part of his project-based homework for the term, he decided he wanted to create a model of a Stone Age hut. We had a look through the Hands-On History book and adapted the fab instructions for building a hut slightly to use up some of the abundant items in our house (especially cardboard!)
You’ll need:
- White air-dry clay
- Sticks and twigs from the garden
- Stones
- Fabric and paper scraps
- Cardboard
- Green and brown paint
- PVA glue
- Twine
Step 1: Prepare your bones!
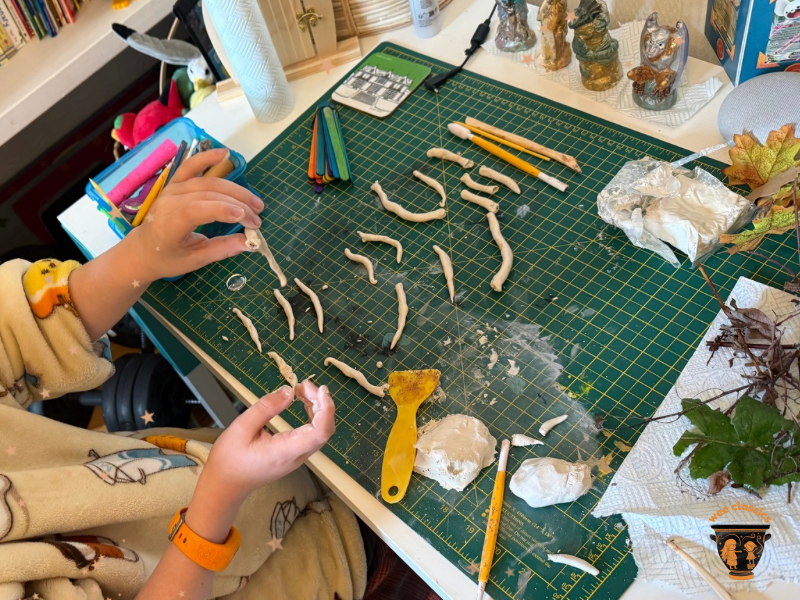
The first thing we need to do is make the little bones that will eventually be used to cover the outside of your New Stone Age home! Take a chunk of your air-dry clay, and roll it in your hands to warm it up. Break off smaller chunks and roll them into sausage shapes. It doesn’t matter if they’re a bit uneven! Once they’re sausaged, use a clay tool or even a pencil to shape the ends a bit. We found that poking a hole in the end made it look extremely gross and bone-like. Leave the bones to dry! At this stage you can also roll some small balls to use as pebbles in Step 3.
Step 2: Make your base
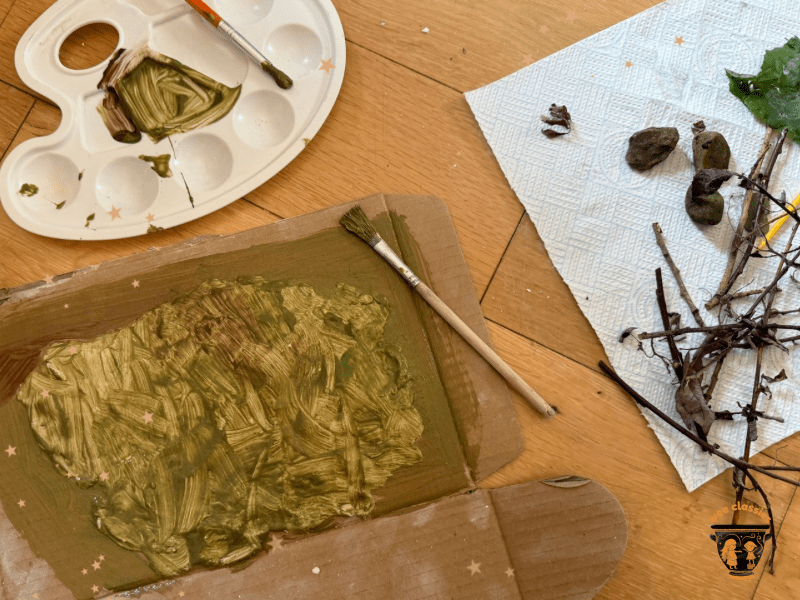
Next, you need to prepare a base for your hut to stand on. The book suggests using a wooden board, but we didn’t have any in the house so we opted for some sturdy cardboard (Amazon packaging is great!) Take another chunk of your air-dry clay and spread it out across the cardboard. It squidges quite well once it has warmed up a bit. It doesn’t matter if it is a bit bumpy and lumpy! It is meant to be the ground, after all. Once you’re happy with your ground, paint over the clay with green and brown colours. You don’t have to wait for it to dry to do this! And keeping it a bit soft makes the next step easier.
Step 3: Assemble your frame
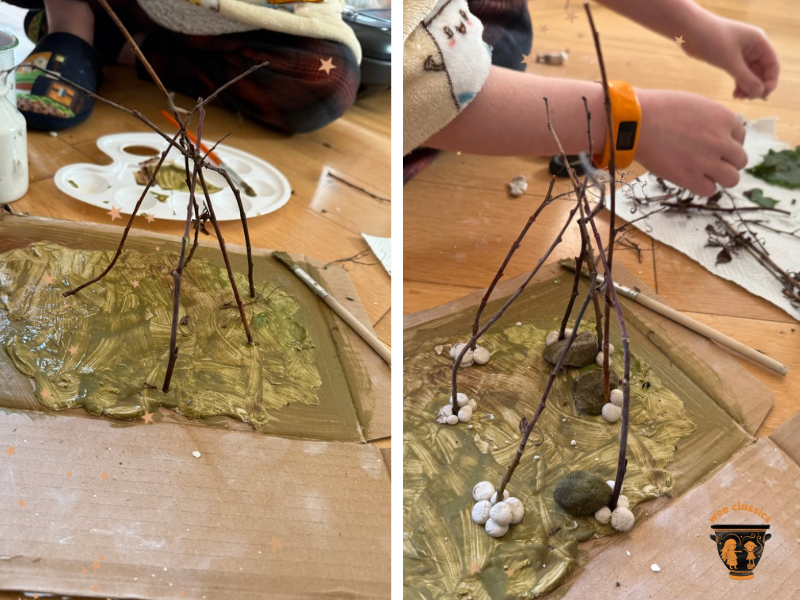
Now for the frame! Gather up the sticks and twigs you collected. Arrange them leaning towards each-other to make a shelter. We set them in a rough circular shape and poked the ends into the still-soft clay. Then we added some smaller clay rocks and real stones around the bottom of each twig to keep them secure. Finally, we tied the top with a small piece of twine.
Step 4: Cover the frame
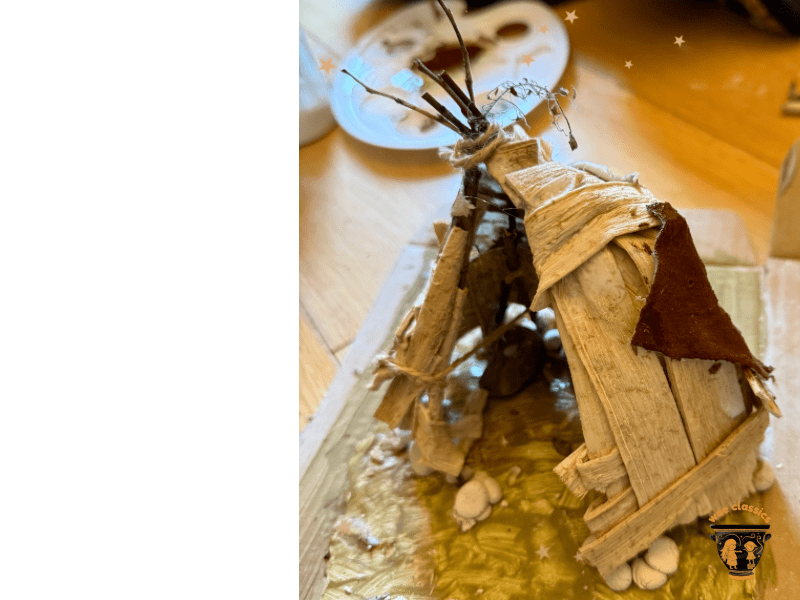
Next up we need to cover our frame with some waterproof material to keep us dry and cosy inside! The Stone Age builders would have used animal skins but we opted for some scrap materials we had around the house – papyrus strips and old fabric. But you can get inventive with this step and recycle whatever you have handy! Our fabric scraps were white so we painted them brown and speckley to make them look more like animal skins. To attach them, we brushed PVA glue all over the underside of each strip then carefully stuck it to the frame. We secured it with a bit more twine, too. This step was definitely the fiddliest. A bit of patience and some scrap engineering will get you through it though!
Step 5: Attach the bones
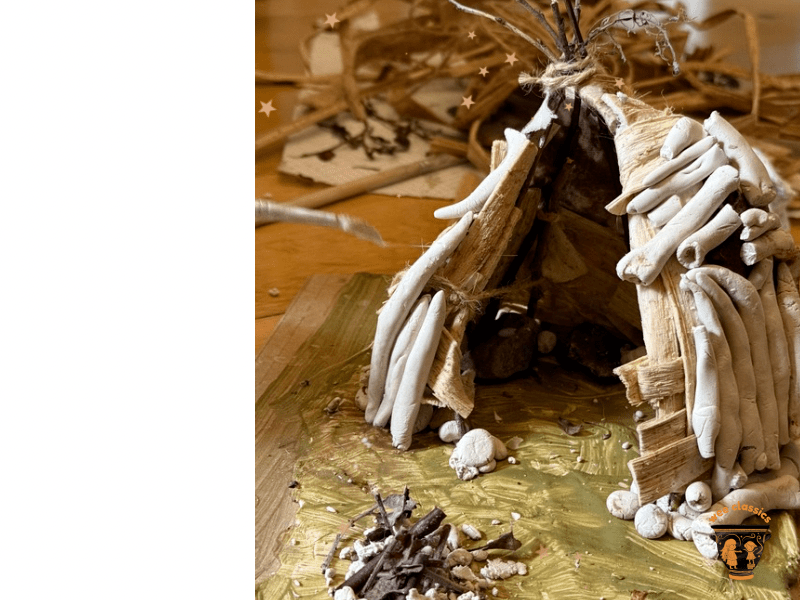
Once the frame is covered, it is time for the best bit: cover the fabric with the bones from Step 1. Ours had dried out a little by this stage but not entirely. Brush each bone with PVA glue and carefully attach it to the outside. Pro top: work from the base upwards so the bones lean their weight on each other, too. It doesn’t have to be a perfectly arranged cover either – enjoy the haphazard process!
Step 6: Enjoy your Stone Age home!
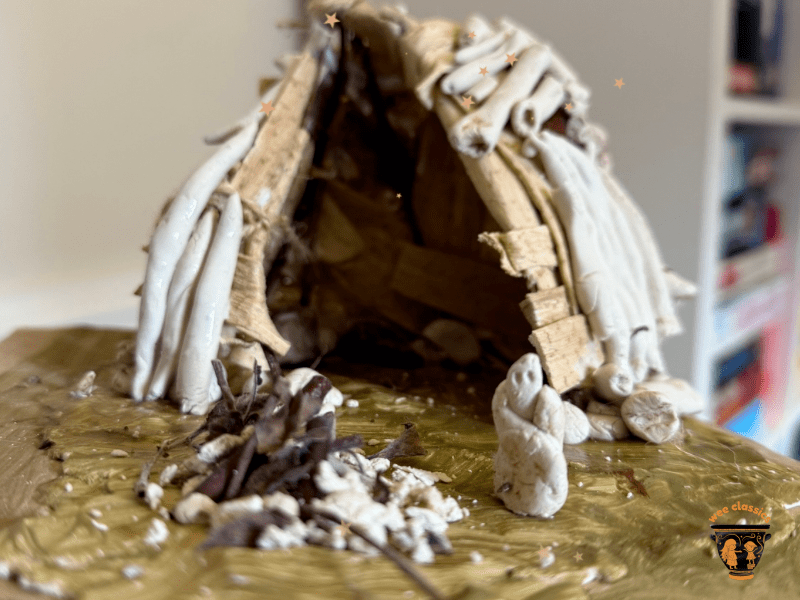
Now your cosy Stone Age hut is complete, you can add in more details. The 7yo created a little fire out of the leftover twigs and clay. He also made a tiny Stone Age man to enjoy his new shelter! We really enjoyed working on this together – and it has definitely inspired us to tackle more historic homes! Maybe something Greek or Roman next…
